Linda Carter, Stampin' Up! Independent Demonstrator
Sr. Supervisor

Thonotosassa, Florida

http://www.lindacarter.stampinup.net/

E-mail: lcart74@gmail.com

Sunday, February 19, 2012

Getting Ready for Red Hats' Play Date!

Working on projects for the Red Hats play date on Saturday, February 11, 2012 - they will be able to make 2 Valentines and 1 General card.  The projects they made are below:
The first card is a sweet Valentine made using the You're My Type stamp set, with the Hearts embosslits, ribbon punch, and rhinestones, with some Riding Hood Red Taffeta ribbons.  Card base and mat where typewriter is stamped is on Naturals Ivory, with mat of Riding Hood Red, and First Edition newspaper print DP. 
The second Valentine was made using the new Heart shaped Framelits to make multiple heart shapes out of Pink Pirouette and Soft Suede.  The stamped image was from the new set, My Heart to Yours - a really nice stamp for remembering days gone by of riding bicycles with your sweetie. 
The general card was made using Blushing Bride paper, ink and pleated ribbon with additional accents of Basic Gray and Basic Black, with a small piece of Twitterpated DP showing a gray and white design.  Everyone got to choose which sentiment best suited them to complete this project.  Looks like I took this pic before I put the bling on it, but each one had a rhinestone in the center of the flower to finish it off.
Each guest received a sweet heart Red Hat treat for attending.  This is a simple treat that when you pull on the ribbon, you pull a candy bar up as your treat.  I loved how these turned out using this old Red Hat set (retired) that I was able to get my hands on and love having it for doing things for this special group of ladies that have come to have a play date at my house twice now.  It is so much fun - for me and for them!!  
Thanks for visiting - Linda

Tuesday, December 27, 2011

Merry Christmas & Happy New Year!

Whew - where did the time go?

As with everything - time slips away so quickly that before you know it - - It's a NEW YEAR!!!  Life has been a bit hectic - Bobby and I got sick with the flu AGAIN over the Thanksgiving holiday which pushed us back a bit with getting ready for Christmas, but we survived and had a wonderful Christmas.  We hope all of you enjoyed a blessed Christmas too.  The New Year is right around the corner and hopefully new postings will be on the way soon as well. 

Stampin' Up! has so many new and exciting things coming our way with the New Occasions Mini Catalog which starts on January 4, 2012.  And .... our greatest time of the year ... SALE-A-BRATION starts January 24, 2012 where with every $50 order you earn a FREE product from Sale-A-Bration mini catalog.  Can't wait to get back to classes and using all the new "toys" that are coming in January. 

Wishing a very Happy New Year with many blessings for each and every one of you!  Thanks for all you have done to bless me with your friendships, encouragement and business throughout 2011.  Hope to see you again very soon in 2012. 

Hugs to all - Linda

Wednesday, November 16, 2011

Fall Weaving Card

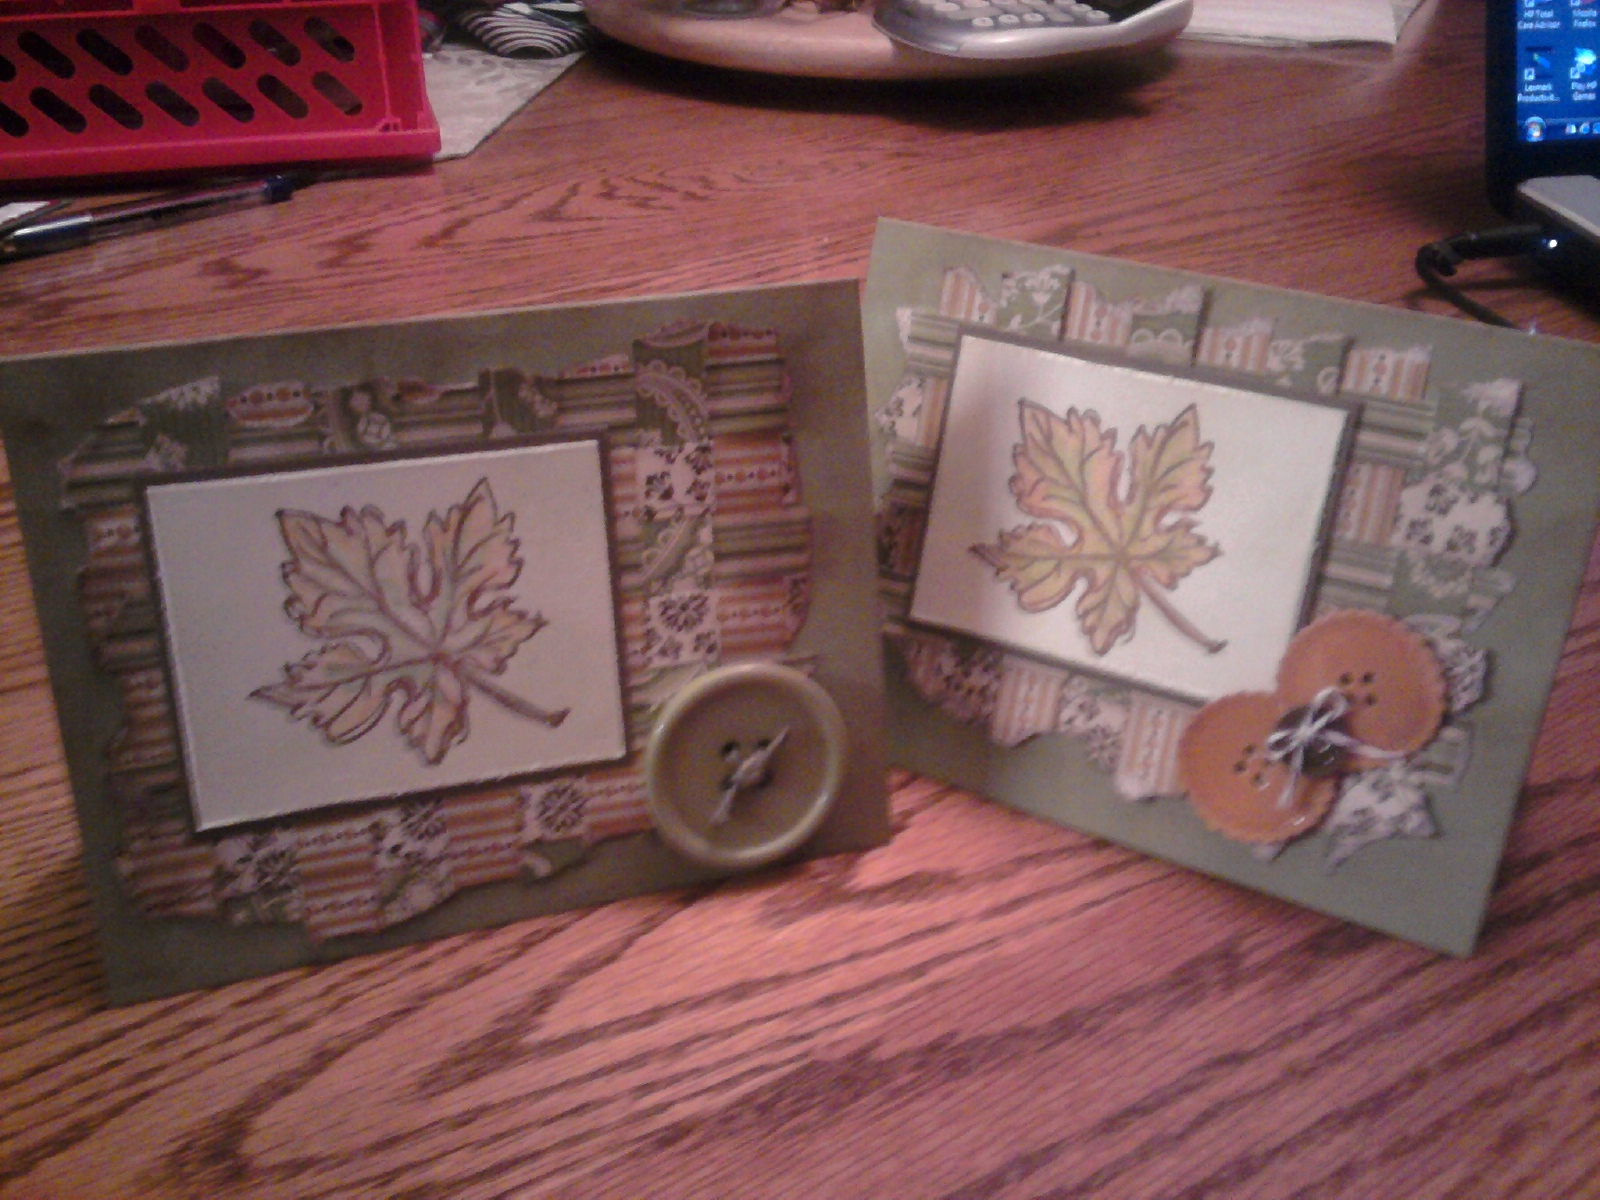
We recently made this card at class using the Pear Pizazz cardstock with the Spice Cake Designer Paper and the Gently Falling stamp set.  We colored the leaf with the Stampin' Up! pencils and on one we used the extra large buttons and on one we used the Buttons Sizzlit to cut out a few buttons and added Crystal Effects to them to make them look more like true buttons. 

Everyone loved the effect of having the small strips of DP together to make a weaved blanket background for our focal point of the leaf. 

Thanks for stopping by.
Happy Stamping - Linda

Christmas Slider Gift Card Holders

We made some cute slider gift card holders using the Two Tags Die at our last class.  I wanted to pass on the instructions to you so that you can make some for your friends and family during this Holiday season.  Made this one using some retired DP from last year, but made several others using the new DP from Letters from Santa also.


1)      Base = Cardstock 4 x 5-1/2” – score at 2-1/2 and 5”

2)      Cut coordinating mat from cardstock at 2-1/4” x 3-3/4”

3)      Cut a piece of Designer Series Paper to 2-1/8” x 3-5/8”

4)      Adhere the DP to card mat of coordinating color leaving 1/8” border

5)      Use 1-1/4” circle punch to punch a half circle from the end of the DP/mat piece

6)      Now adhere the DP piece & mat to the card base – use the 1” circle punch to punch a half circle in the right edge of the sleeve so it is just inside the half circle of the Designer Paper.

7)      Put a piece of sticky strip along the inside left edge of sleeve as close to the edge as you can get. Also put a piece of sticky strip along the small flap as well.

8)      Remove the protective backing from sticky strip and adhere the sleeve together.

9)      Cut a piece of coordinating card stock for the gift tag holder tag loop to 2-1/4” x 11” – score and fold in half at 5-1/2”.

10)  Place the folded piece of card stock on the Two Tags Die so the folded edge is just below the cutting edge along the flat side of the scallop-ended tag.  You don’t want the die to cut your card stock on this end.

11)  Put a small piece of sticky strip on the inside of the scalloped end as close to the outside edge as you can get.  Adhere the two ends together (I use a gift card as my spacer to make sure I don’t get it taped down too far).

12)  Punch a scallop circle from a scrap of card stock using the 1-3/4”scallop circle punch.

13)  Adhere the right side only of the scallop circle punch out to the scallop on the end of the tag loop with dimensionals.  Make sure the left side of scallop circle punch out is not adhered down so that it can slide over the top of the sleeve as the tag loop is inserted.

14)  Finish decorating as desired. 

We also made a cute Santa Owl one that everyone seemed to love - hope you will too.

Some other ones we made using this template - these are simple but really nice looking.
Thanks for visiting and good luck with your projects. 
Happy Stamping -
Linda

Tuesday, October 25, 2011

Revisiting Christmas in July Class

We made 2 of each of the 4 designs shown to get our collection of Christmas cards started.  The first one used the Serene Snowflakes set with some Pacific Point Blue ink and designer paper.  Added some bling & ribbon to finish it off.
Next, was our fun card made with the cute gingerbread man from the Got Treats set.  Using the zigzag border from the Tasteful Trim die, some Espresso Baker's Twine and some pearls for the buttons on our gingerbread men to dress them up a bit made this card complete.
One of my favorite Christmas stamp sets is the Come to Bethlehem set.  It looks so rich and elegant when stamped in Soft Suede and added to Cherry Cobbler card stock, layered with Soft Suede card stock using the Petals a Plenty impression folder.  We even added a little surprise inside by adding the impression folder on just the end of the inside vanilla cardstock to dress it up a bit for our sentiment.
The last project was a card using the circle scallop die with the Big Shot to create a folded scallop card making it look somewhat like an ornament.  We used the Delightful Decorations stamp set and some retired Christmas designer paper from last year to finish them off. 
Friday night group working on their cards and having a good time (Missy, Kristine, Lily, Tara, Leslie and Gloribi). 
Door prizes for the the Christmas in July classes - one for Friday night and one for Saturday night class.    A perfect thermal cup for crafting with a lid and straw included filled with various embellishments, etc. Leslie won the Friday night prize.
Susan had been missing from classes for several months due to a hip replacement surgery.  We were excited to have her back to join in the festivities of making some Christmas cards.  Susan has great luck at winning - - she returned and WON the door prize again on her first night back to class.  :o)  Everyone likes to pick at her - but it is truly just LUCK and she definitely has GOOD LUCK on her side - no matter which way we draw for door prizes!  Love ya Susan!  

Hope you enjoyed our fun with Christmas in July.  

Stop back to visit soon.
Happy Stamping!
Linda